So, a few weeks ago I came across these Halloween Bandanna's on an end-cap at Wal-Mart:
 Cute Right?!!?
I'm not the Bandanna kinda girl but, I thought these were perfect to try and make a skirt for Allie. And for my first ever Bandanna skirt, I am one happy woman! Especially since it took me maybe a half hour to put it all together!
It's so easy! See:
Step One:
 Fold in half and steam iron
 Cut in half on the fold
  I forgot a picture here but, Trim off and inch off of the sides. Your bandanna will have writing on the side and I didn't like it. So I cut mine off. Then fold the bottom hem under to the wrong side and iron in place. *You do not need to double fold because it's already hemmed at the bottom.
Step Two:
 *This step is optional. But, I thought it added a lot to the skirt. So, I made some ruffles to stick under the skirt. Pinned it in place on the wrong side.
Flipped it over and sewed a hem straight down...repeat with the other half of your bandanna
 Here's what your skirt will look like on the right side:
Now, pin the two pieces together, wrong side out and sew straight down.
Back stitching at each end.
(Sorry the picture is sideways!)
 Step Three:
 This step happened on accident! ;-) I had realized that once I had sewn both ends together I had forgotten to make a spot for the elastic! Whoops! lol
(And I ended up thinking it turned out really cute anyways, so oh well! ;-) But, if you know what I mean with the elastic go ahead and do it the right way. If not, here's what I did:
Turn the top of your fabric over so the right side is now on top of your wrong side. You'll have to take some measurements with your elastic to make sure you have enough fabric turned over. Now, sew a stitch at the top. (In the picture above it's the only seam you see)
Then I made another seam to create a "pocket" for the elastic.
(Here's a bigger picture for ya...kinda confused? lol)
 Making sure to leave an opening so I could run the elastic through...measure your little ones tummy around before you cut your piece of elastic. I cut mine to 19 and 1/2 then I trimmed off about two inches once it was in the "pocket" on the skirt.
And, of course I couldn't get to far with out my little helper to come and help me! :-)
 Once your elastic is all the way through snip off a little extra like I mentioned above and sew the two ends together.
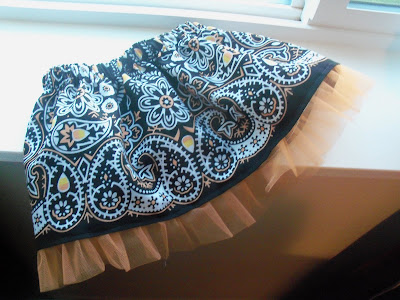
And here's what it looks like:
 *love*
 My "Oops" turned out to be great! ;-) lol
And because I know it's like next to impossible to capture a "still" picture of an almost 2 year old I grabbed one before I put it on her!
 Umm? Adorable?
YES!
 Of course I couldn't stop there! I had to make her a bow! hehe ;-)
I was able to catch one good picture of her this morning...it wasn't easy but I got one! :-)
 How much do you think it cost me to make? What? Only $2? I know, it's great! The Bandanna was a dollar. I might have used .25cents worth of my elastic and .75 cents for the 1/4th of a yard of tulle I got.
Enjoy your Thursday!!
Courtney


